Introduction
Images are a critical part of any CRE document. Providing property photos, floor plans, and other support visual imagery enhances the appeal of the document and deal. In Lev Memo, we make it easy to add / replace / edit images.
Adding an Image
Slash Command or Insert Menu
- Slash Command - type /image or /gallery
- Click on the Image Icon from the insert Menu
Choose an Upload Method
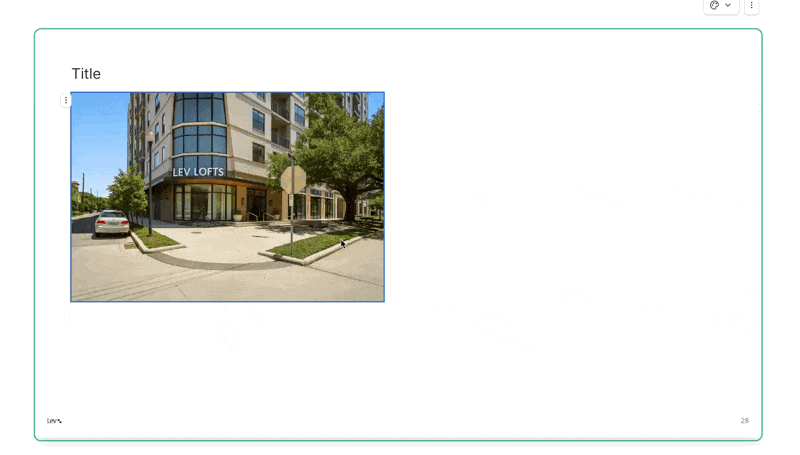
- Click on the image placeholder to upload an image
- Image Library
- Image Upload - Select an image from your computer to upload
- Images from your deal documents will automatically appear here
- Web Search - browse for royalty-free images
- Image Library
Editing an Image
Resizing and repositioning an Image
- Click and Drag the image borders to resize it as needed
- Use the alignment options in the Image menu to align the image to the left / center / right of the container
Replacing an Image
- Click on the Image to bring up it's menu right above it
- Click on the image Icon to bring up the image library
- Choose the new image you want and click apply
Changing Focal Point
Only available for accent images and for images in smart layouts
- Click on the Image to bring up it's menu
- Click on the change focal point icon to bring up a small modal
- Choose the image's new focal point
Cropping
Only available for regular image uploads
- Click on the image to bring up it's menu
- Click on the crop icon to bring up the crop modal
- Crop the image to your liking and apply
Different Image Types
Gallery Images
Galleries can be used to easily structure multiple images together on a page. This allows you to create visually stunning documents that showcase different aspects of your property.
Add a Gallery
- Slash Command - type /gallery
- click on the "+" menu and scroll down to Gallery
Add Pictures to Your Gallery
- Click on the image placeholder to add your first picture
- Add additional images to your gallery as needed (hold down Ctrl (PC) and Cmd (Mac) to select multiple images at once to add)
Format Your Gallery
- Choose between different gallery layouts
- Grid - Fixed cells with equal width and height
- Flex - Wraps items in rows, sized by width
- Column - Equal-height columns with flexible widths in a single row
- Stacked - Equal-width rows with flexible heights in a single column
- Resizing your gallery - drag the border of your gallery to resize it vertically
Accent Images
Accent images are elements that fill up part of card from border-to-border. These can be used to showcase large visuals such as an property photo, aerials, and maps.
Add an Accent Image
- Click on the page setting icon (above the top right corner of the slide) and pick an accent position
- Click on the accent's menu and add/update the image
Editing an Accent image
- Click on the add/update image icon to swap out the accent image
- Click on the trash icon to remove the image or delete the accent entirely
- Adjust the size of the accent image by dragging the border of the accent
- Use the crosshairs icon to adjust the focal point of the image to be shown in the accent
- Choose Fit Image to ensure the entire image fits neatly within the accent
Images in Smart Layouts
Images can be added to the Images with Text smart layout. This allows you to create structured layouts that showcase visuals supported by descriptive text. These are useful for tenant overviews, comparable properties, showcasing prior properties, and so on.
Add an Image with Text smart layout
- Slash Command - type /Text with Image Boxes
- Click on the "+" menu and scroll down to Text with Image Boxes
Editing an Image with Text
- Click on the image to upload an image or replace it
- Use the Item's menu (horizontal … above the image) to
- Change the image's focal point
- Remove the Image