Track your lender outreach progress by updating placement status as you communicate with lenders and move through the deal process.
Getting Started
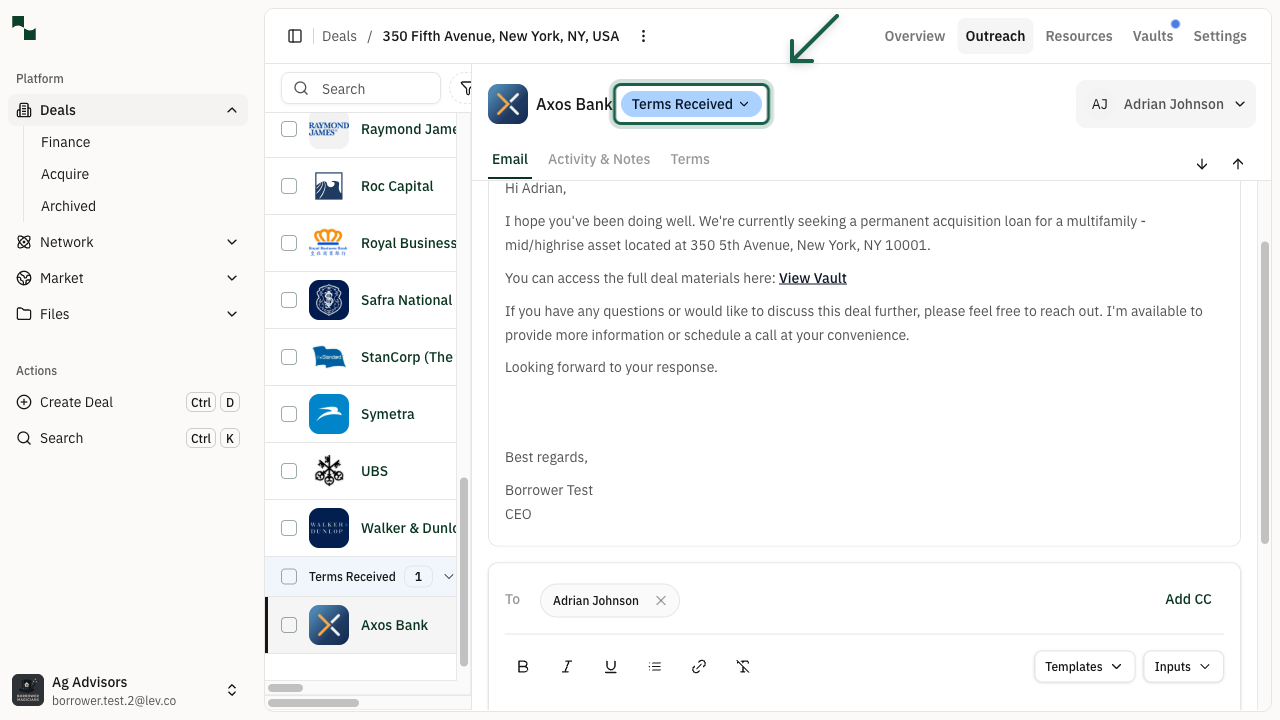
Open Lender Side Panel
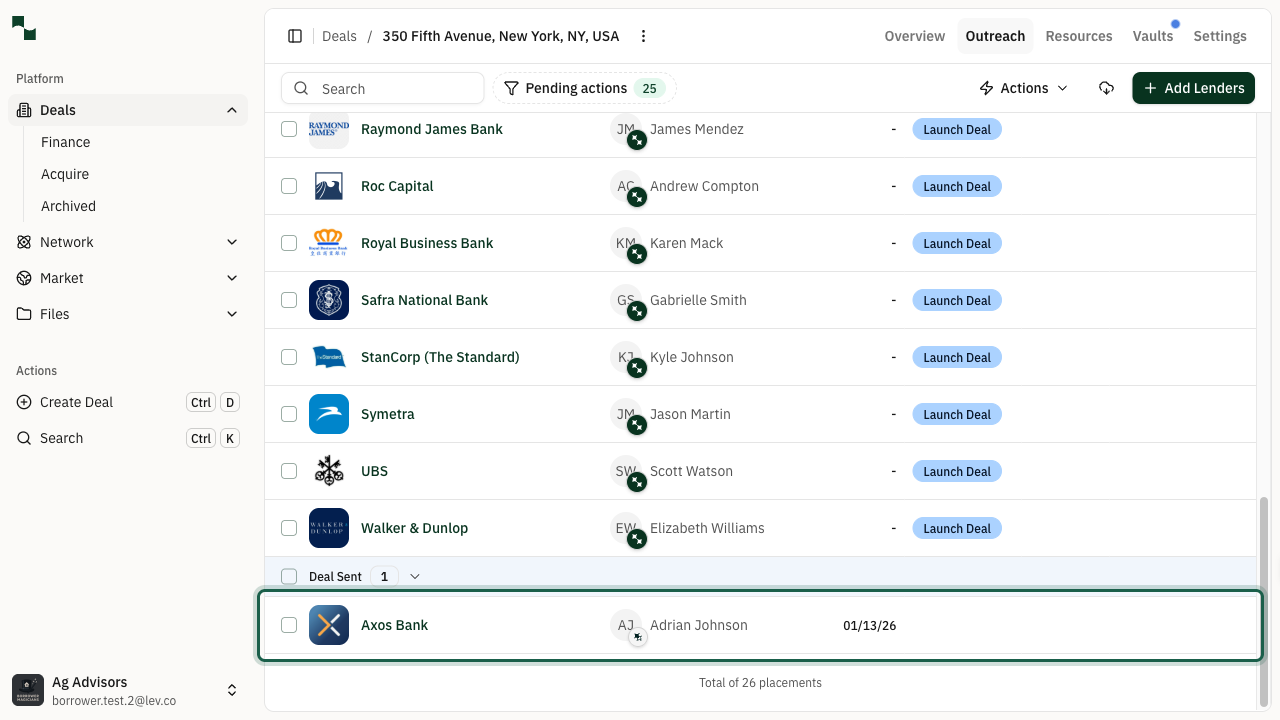
Navigate to your deal's Outreach tab where you can see all lenders you've added to your deal. Click on any lender name in the table to open their side panel.
Location: Deals > [Your Deal] > Outreach
View Current Status
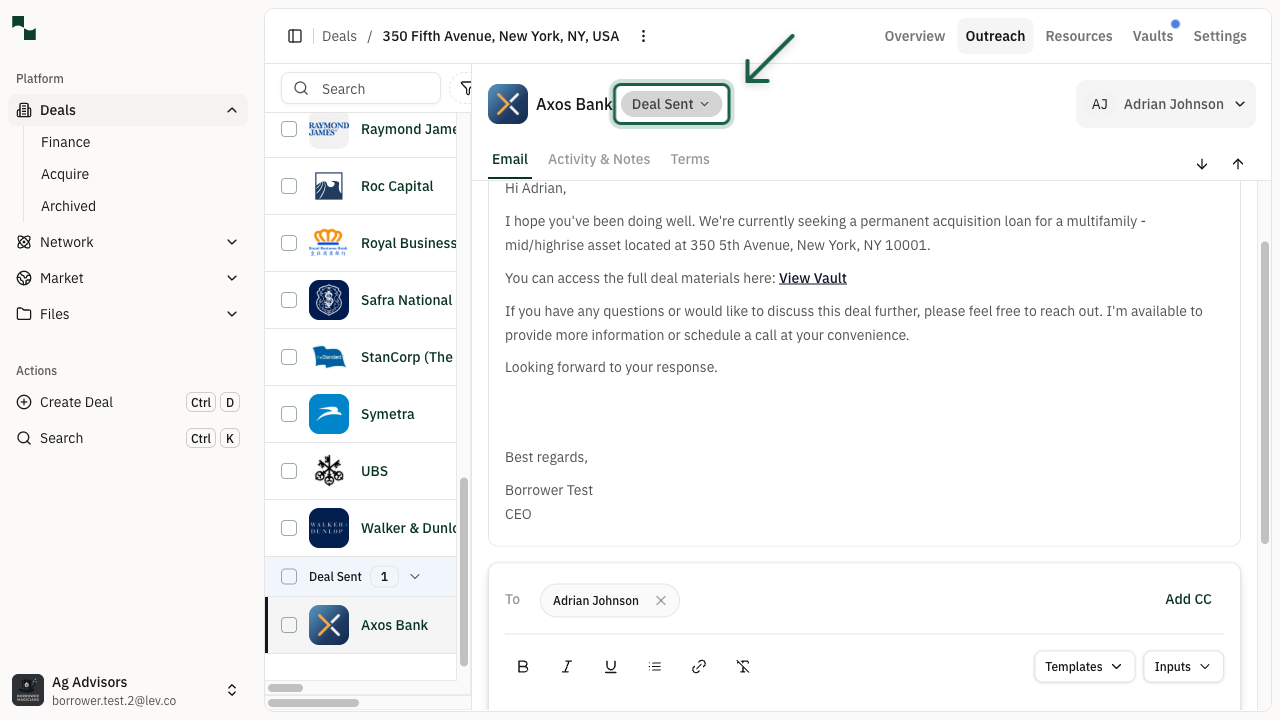
When the side panel opens, you'll see the lender's current status displayed at the top. After launching a deal, lenders start with the Deal Sent status.
The side panel also shows tabs for Email, Activity & Notes, and Terms to help you manage your communication with this lender.
Updating Lender Status
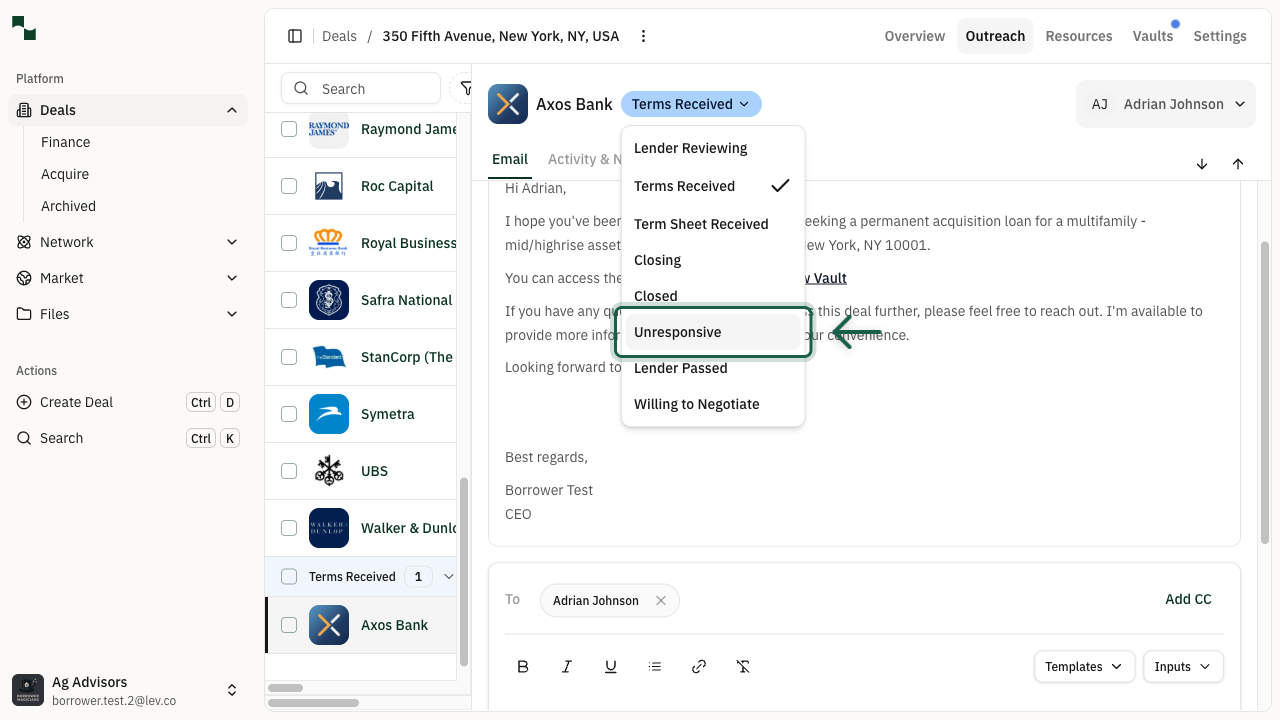
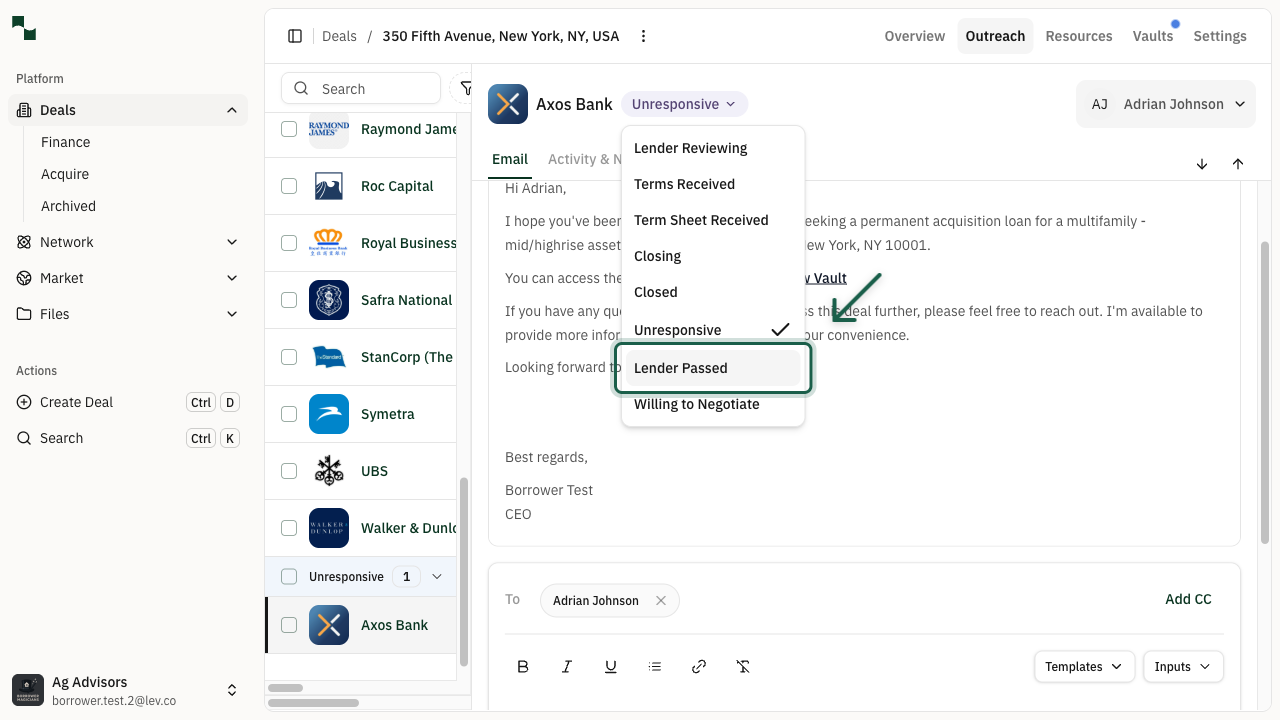
Open Status Dropdown
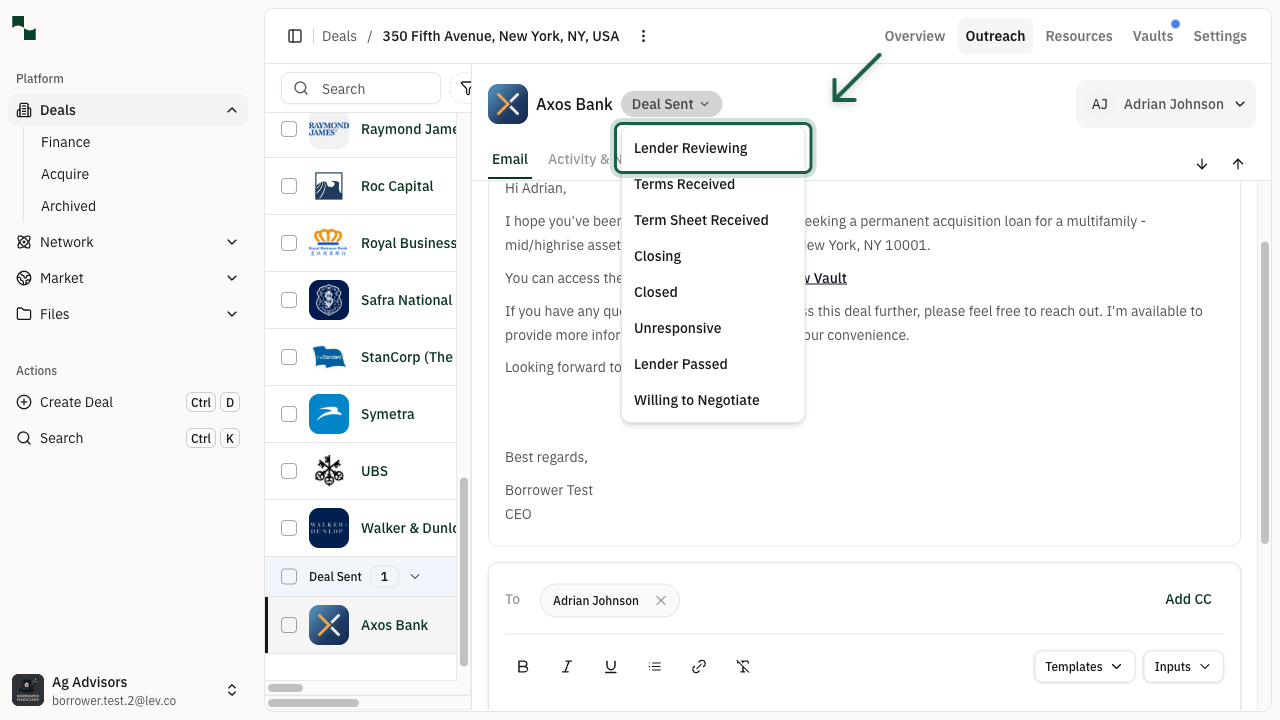
Click on the status dropdown button to see all available status options. The status you can select depends on where you are in the lender relationship process.
Available statuses include: Deal Sent, Lender Reviewing, Terms Received, Unresponsive, and Lender Passed.
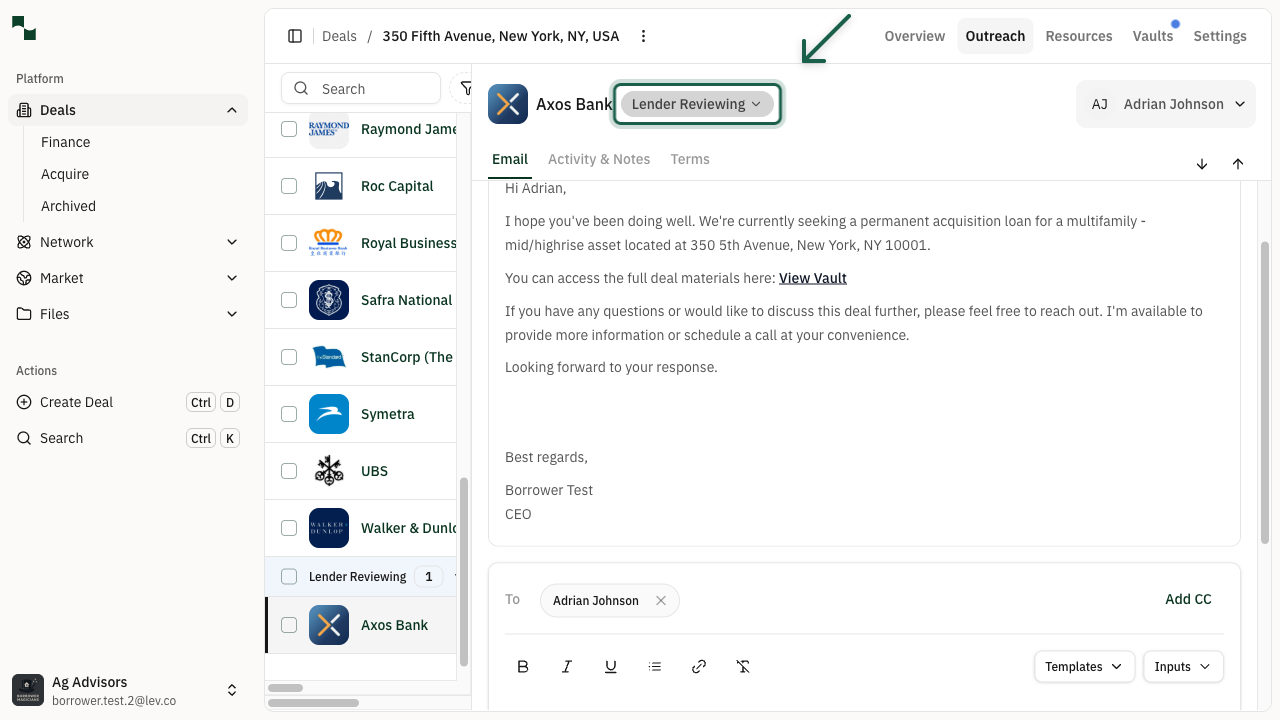
Select Lender Reviewing
When a lender acknowledges your deal and begins their review process, update the status to Lender Reviewing. This helps you track which lenders are actively considering your deal.
You'll see a confirmation message when the status is successfully updated.
Update to Terms Received
When a lender provides you with a quote or term sheet, update the status to Terms Received. This is an important milestone in your deal process.
You may see a congratulations modal when receiving your first quote - you can close it or use it to add quote details.
Mark as Unresponsive
If a lender stops responding to your communications, you can mark them as Unresponsive. Open the status dropdown and select this option.
This helps you focus your efforts on lenders who are actively engaged with your deal.
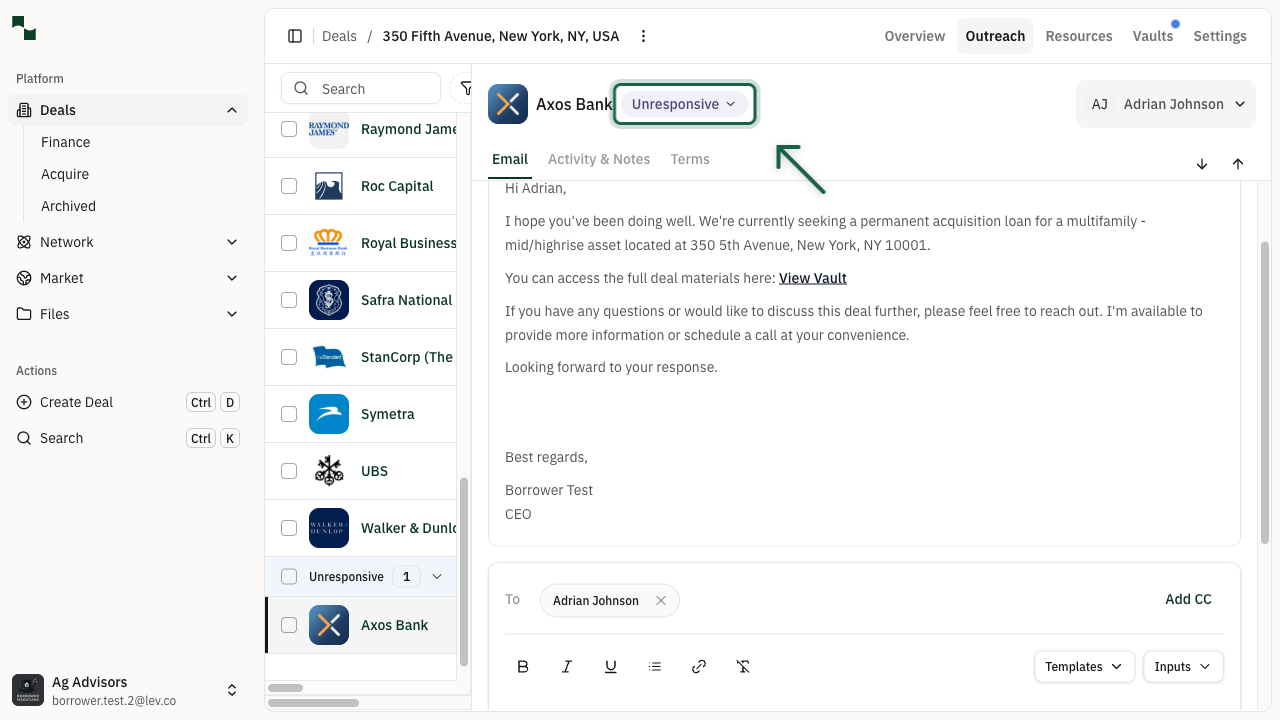
Verify Unresponsive Status
After selecting Unresponsive, the status dropdown will update to show the new status. The lender will also be moved to the Unresponsive section in your lender table.
Recording Lender Pass
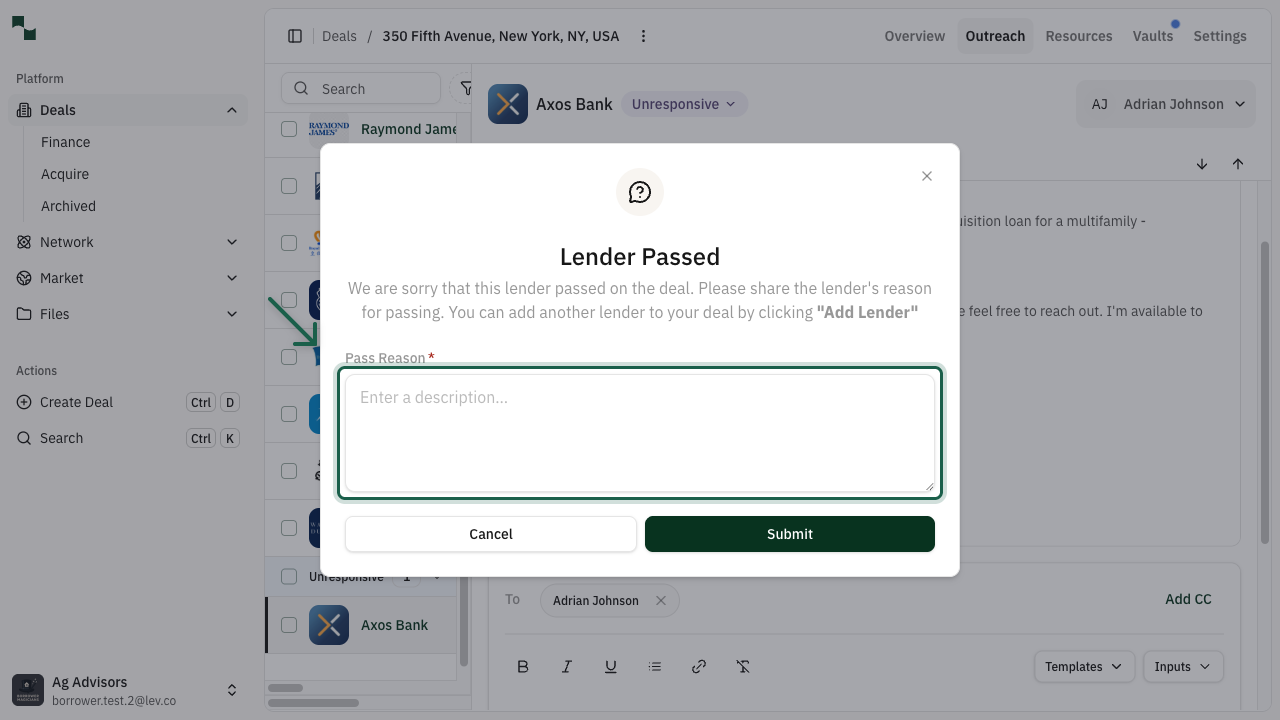
Select Lender Passed
If a lender decides not to proceed with your deal, update their status to Lender Passed. Open the status dropdown and select this option.
Enter Pass Reason
When you select Lender Passed, a modal appears asking for the reason the lender passed on your deal. Enter a brief description of why the lender declined.
This information helps Lev improve lender matching and may help you understand patterns in lender feedback.
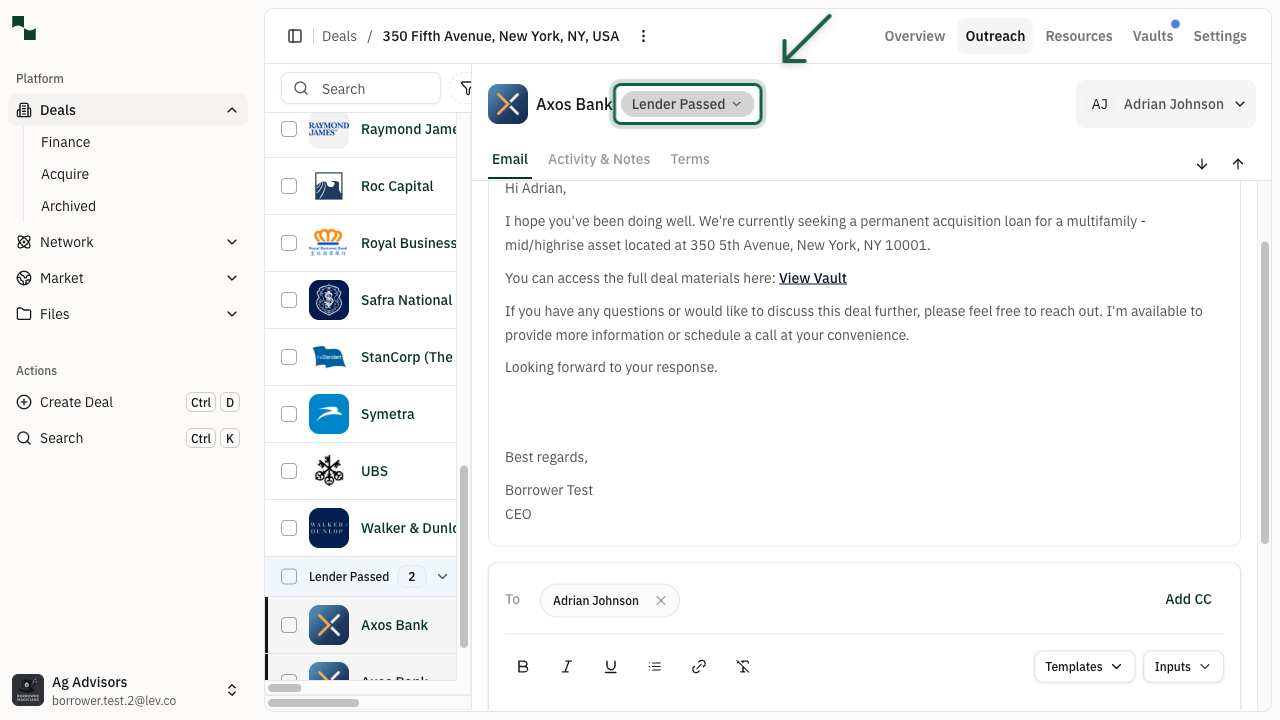
Confirm Final Status
After submitting the pass reason, the lender's status will be updated to Lender Passed. You'll see a confirmation message, and Lev may automatically add a replacement lender to your deal.
The lender will be moved to the "Lender Passed" section in your placement table.
You're All Set!
- You've learned how to update lender status as you progress through your deal
- Lenders can be tracked through: Deal Sent, Lender Reviewing, Terms Received, Unresponsive, and Lender Passed
- When a lender passes, Lev may automatically add a replacement lender to help you continue your outreach
- Keep your lender statuses updated to maintain an accurate view of your deal pipeline